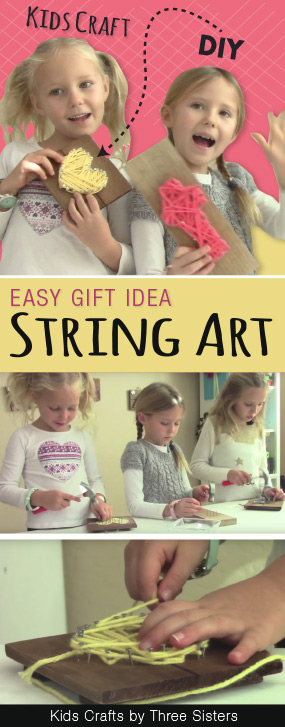
Easy String Art for Kids
Inspiration for this kids craft came from our dear friends Polly & Ally! They made beautiful wall art using nails & string and they were so stunning we tried it too. Although we had a few hiccups in the video. It's your benefit because you can learn from our mistakes 😉
ITEMS NEEDED TO MAKE STRING ART:
• 1 piece of wood
(We found those little squares at Michaels - $1.98)
• Hammer
(Kids hammer found at Lowe's for $2.98)
• Nails
• Yarn
Here's the link for the kids hammer. It's not necessary, but we did find it safer for little fingers...especially for kids 5 years of age.
Feel free to embellish the art as much or as little as you'd like. Add paint, words, wood stencils, etc. We kept it simple for the tutorial. This easy kids craft makes an awesome gift or piece of artwork to hang in your room.
STEPS TO CREATE EASY STRING ART:
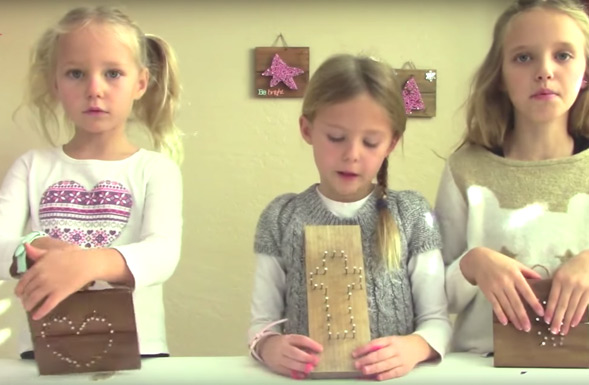
STEP 1: Begin by deciding on what shape you'd like for your wall art. As seen from the video here, Grace chose a heart while Reese & Riley originally opted for a silhouette of a gymnast. Size accordingly by drawing or printing out the shape onto the piece of wood.
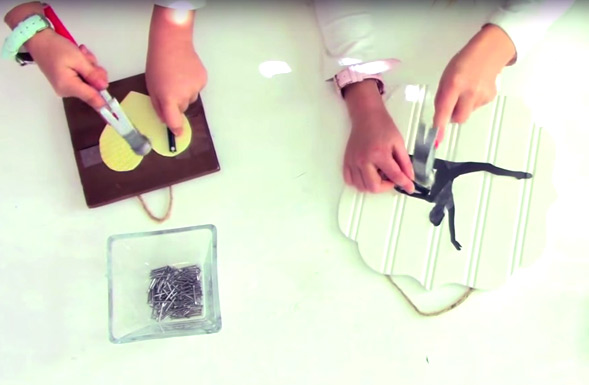
STEP 2: With the shape drawn or taped in place, hammer the nails around the edge of the silhouette.
NOTE: Make sure the wood you selected is real wood and not a piece of treated material. We didn't realize Reese's plaque wouldn't work until we started filming.
As they say in show-business: "The show must go on!" Thank goodness we saved pieces of an old cutting board. Of course, she had to modify her shape too because the wood slab was vertical and her original silhouette wouldn't fit. She decided to do a cross. "Praise the Lord." 🙂
.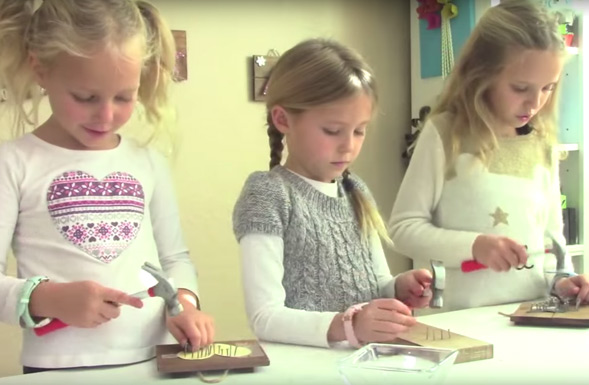
STEP 3: Now that all the nails are in place, tear off the paper. This will leave you with only the nails. Your shape should be viewable to the naked-eye.
NOTE: At this point Riley realized that her shape was a bit complicated to see. But we kept going with it to see the final result.
YOU'RE DOING GREAT, KEEP GOING...
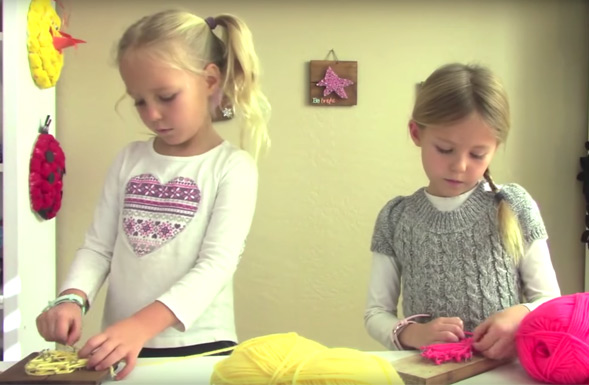
STEP 4: Grab the yarn and tie a knot at the bottom of one of the nails. From here, wrap the yarn or twine in any pattern you like from nail to nail. Move horizontally, vertically and diagonally. AS SHOWN IN THE VIDEO.
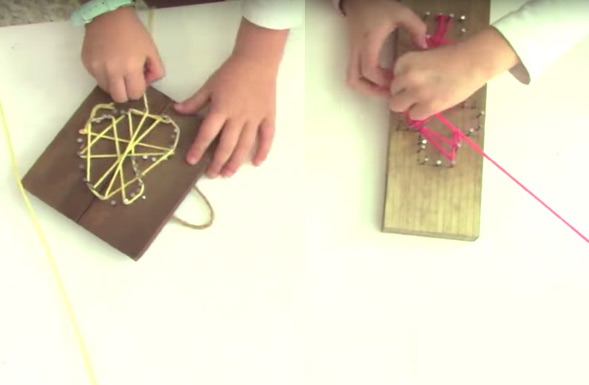
STEP 5: The hard part is knowing when to stop winding the yarn. When you make that decision, cut the yarn and tie the end to a nail at the bottom of your shape. Riley decided to stop the project at this point. The gymnast was too difficult to see.
NOTE: So when selecting silhouettes, KEEP IT SIMPLE. Shapes such as hearts, stars and crosses will be much easier for kids.
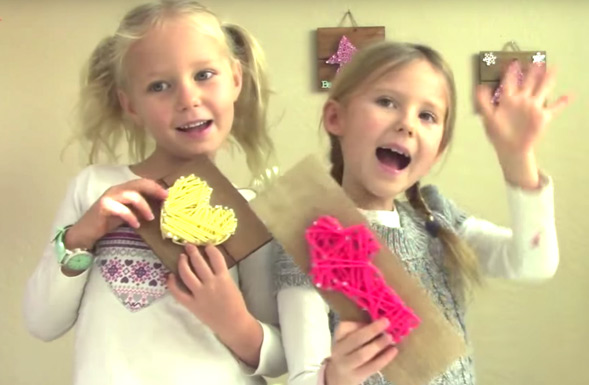
STEP 6: And this is the final result! Embellish the art with stamps, beads, paints or wood cut outs. Just be a kid.
What others are reading
 Easy Homemade Sugar Scrub Recipe for Kids with Coconut Oil
 Egg Carton Craft – Flower Art – DIY Mother’s Day Wall Art
 Easy Plastic Bottle Suncatcher Craft
 How to Paint Rocks for The Kindness Rocks Project
 How to Make Fluffy Slime with Saline Solution
 Rescue the Reindeer: Kids Christmas Game
 DIY Popsicle Bath Bomb Recipe
 How to Make Toilet Paper Roll Wall Art – Butterflies & Flowers