How to Make a Pine Cone Monster Halloween Wreath
A friend gave us over 100 pine cones and said "See, what can you make with these?" Of course, we love a challenge, and immediately scoured the internet for different pine cone crafts. Lo and behold we stumbled on the most clever Monster Halloween Wreath by Linda at Craftaholics Anonymous®. Her original tutorial can be seen here.
The Monster Halloween Wreath was not only a perfect use for our pine cones, but ideal for the season. Truth be told this craft is a bit time consuming; however the results are stunning. We put so much effort into painting our pine cones that we wanted to extend the life of our Halloween Wreath and transform it into a Christmas Wreath. Very easy to do by attaching the Monster facial features with velcro and swapping them out for "The Grinch" features.
We'll do an official tutorial on our "Christmas Grinch Wreath" next. If you can't wait...get a sneak peek of what it looks like in our YouTube Video.
 SUPPLIES YOU'LL NEED TO MAKE A PINE CONE MONSTER HALLOWEEN WREATH:
• Pine Cones in various sizes - We used 46.
• 1 - 11.5" Foam Wreath
• Hot Glue Gun with tons of Glue Sticks.
• 2 - 8oz. containers of Lime Green Acrylic Paint
• 2 - 2" White Foam Balls or Ping Pong Balls
• 1 - Sheet of White Foam
• Orange Ribbon
STEPS TO MAKE A CREATE PINE CONE MONSTER HALLOWEEN WREATH
STEP 1: If you found your pine cones outside it's a good idea to bake them in the oven at 200 degrees for 20 minutes. This will get rid of any bugs that may be hiding inside your pine cones. If you bought your pine cones, move to the next step.
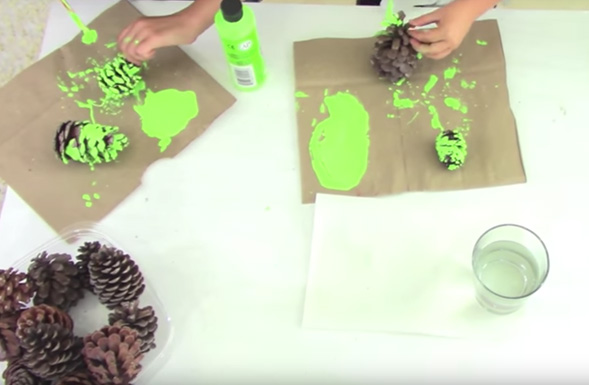
STEP 2: Paint your pine cones and let them dry overnight. We used a paint brush with hard bristles to get into the nooks & crannies of the pine cones. This step takes a while, so grab the neighborhood kids and have fun ;-). Just being honest.
NOTE: We tried dipping the entire pine cone in paint, but ran into two snags: 1) Dipping used a lot of paint & 2) Due to the moisture of the paint, as the dipped pine cones were drying they closed up. We didn't have this problem when we painted them individually. Yep...spray painting the pine cones would probably be quicker; however because we're kids, we chose the hand-painted method.
STEP 3: Start hot gluing the pine cones around the foam wreath. As each pine cone was glued on we placed a lid or chip clip under the pine cone until the glue dried. (About 5–15 seconds)
NOTE: Using Craftaholics Anonymous® tip, we glued our large pine cones around the edge, filling the wreath in with a variety of sizes as we moved along.

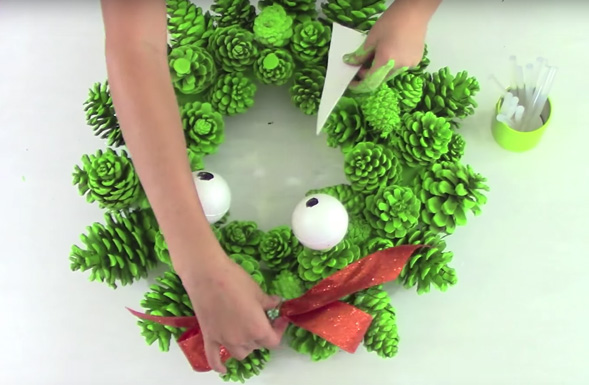
STEP 4: Realizing this was a lot of work, we started wondering if we could extend the life of our Halloween Wreath by converting it into a Christmas Wreath. So we decided to attach our Halloween Monster features with small velcro tabs. This gave us the flexibility to swap our the Halloween eyes, bow & teeth for our Christmas Grinch eyes, santa cap & smile.
NOTE: We purposely painted our white velcro tabs with the same green paint we used on the pine cones. Then we hot glued them in position on the Halloween Wreath. If you pre-position your monster, eyes, bow & teeth on the wreath you can easily determine where to put the velcro tabs.

STEP 5: Paint black circles into the middle of the White foam ball for Monster eyes.
STEP 6: Cut triangles out of White foam for the teeth.

STEP 7: Tie the Orange ribbon into a bow & puff out the loops.

STEP 8: Hot glue the other end of the velcro tabs on your Monster features and add to the Halloween Wreath
STEP 9: Hang on your door using a wreath hanger and enjoy!
We'll do a separate tutorial for "The Christmas Grinch Wreath"; however if you want a sneak peek watch our How to Make a Monster Halloween Wreath on YouTube.
What others are reading
 How to Make Homemade Sidewalk Chalk
 Fluffy Paper Plate Animals
 Toilet Paper Roll Craft – Caterpillars
 DIY Fairy Jar – Night Light or Party Decor
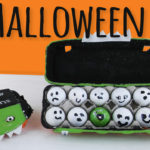 Ghosts & Goblins Halloween Game for Kids
 How to Make Slime Ball Popsicle Stick Bracelets
 Popsicle Stick Bracelets: an easy and affordable, DIY jewelry craft
 How to Make Bird Newspaper Art for Kids